Breathing Vintage Life into My Flat: A Realistic, DIY Makeover Journey
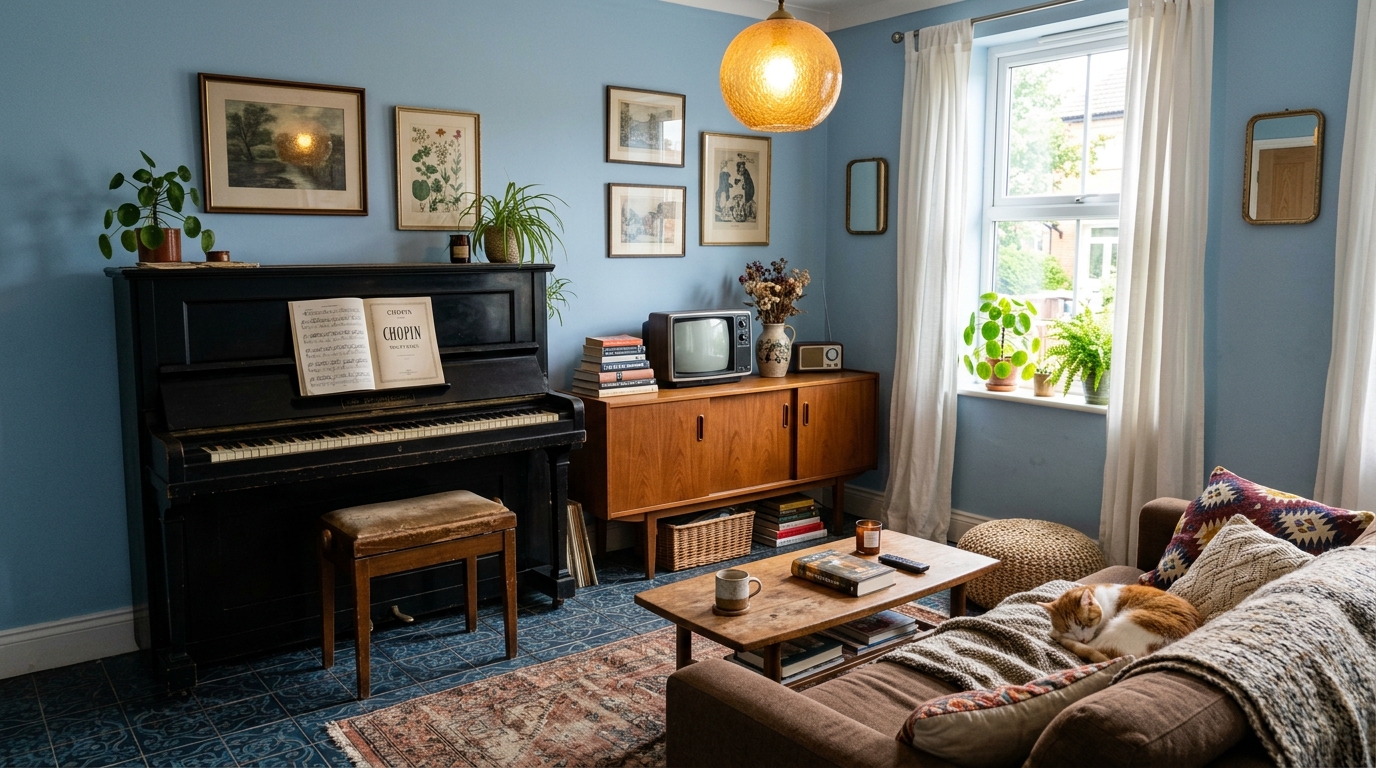
"There is a distinct moment every homeowner or tenant experiences when your space stops feeling like a sanctuary and starts feeling like a checklist of small annoyances. For me, that moment arrived earlier this year."
I looked around my flat and couldn't unsee the wear and tear. The wallpaper had begun to peel, tear, and curl at the edges, looking distinctly exhausted. The kitchen cabinets, once neutral and functional, felt tired, dated, and visually heavy. On top of that, everyday living had accumulated friction: kitchen counters were perpetually overcrowded, the bedroom wardrobe was bursting at the seams, and the overall vibe leaned more toward "cluttered storage unit" than the warm, curated home I envisioned.
A full-gut renovation with contractors, architectural drawings, and months of demolition was out of the question—both for my budget and my sanity. Instead, I set out on a mission to transform the space myself. My goal was simple: lean into a warm, character-filled vintage aesthetic, solve our chronic storage bottlenecks, and do it smartly through thoughtful DIY updates and intentional furniture choices.
It has been weeks of measuring, painting, peeling, sticking, and rearranging. While the transformation is still very much a work-in-progress, the flat has already begun to feel like a completely new chapter. Here is how the journey has unfolded so far.
1. Erasing the Fatigue: Fresh Paint & Kitchen Cabinet Revival
The first hurdle was addressing the surfaces. Peeling wallpaper has a depressing way of dragging down the light in an entire room. Removing torn wall coverings and prepping the surfaces took genuine elbow grease—there are few things as humbling as spending hours scraping off stubborn adhesive backing.
Once the walls were smooth, I bypassed the temptation to simply re-paper and chose paint instead. Opting for a clean, velvety, warm-toned paint gave the entire flat an immediate lift. Painted walls provide a calm, uniform canvas that bounces natural light beautifully, making our compact layout feel instantly airier and far more intentional.
Then came the kitchen. The layout itself was fine, but the cabinetry was stuck in a bygone era of drab finishes. Completely replacing kitchen cabinets is one of the priciest line items in any home renovation, yet functionally, the cabinet carcasses were still in good shape.
Instead of ripping them out, I decided to refresh their color. Painting kitchen cabinetry requires patience—scuff-sanding the laminate, applying a high-adhesion primer, and laying down smooth coats of durable cabinet enamel. I chose a shade that anchored the space, shifting the kitchen from looking like an afterthought into a deliberate focal point. That single change completely erased the tired look of the room without costing thousands of dollars.
2. Re-engineering the Dressing Room: The Open Wardrobe System
With the walls settled, I turned my attention to our storage. If there is one space that dictates morning peace of mind, it is the wardrobe. Over time, heavy, enclosed wardrobes had made our dressing area feel dark, cramped, and somehow simultaneously full yet disorganized. It was time for an honest purge.
I started by clearing out the dead weight, saying goodbye to pieces of worn-out furniture that were consuming floor space without providing efficient storage. Then began weeks of spatial puzzle-solving. I spent evenings sketching out dimensions, comparing modular setups, and planning how to maximize every vertical inch of our dressing room.
My core vision was an open wardrobe concept that felt boutique yet practical:
- The 120cm Foundation: I opted for sturdy base cabinets sitting around 120cm in height. This specific height creates an accessible countertop surface for trays, jewelry, and daily accessories while providing deep drawers below for folded essentials.
- Overhead Hanging Rails: Above these cabinets, I installed robust, well-spaced hanging rails. In our climate and daily routine, hanging is vastly superior to folding. The rails now hold our high-rotation rotation of shirts, tees, tailored jackets, and trousers, kept neat and completely visible at a glance. No more digging through dark closet corners to find a specific blazer.
- The Dedicated 50-Handbag Sanctuary: Anyone with a serious collection of handbags knows the heartbreak of squishing them onto single upper shelves or stuffing them into dust bags where they are forgotten. I integrated a dedicated, compartmentalized storage unit specifically proportioned to house my collection of roughly 50 handbags. Each piece now sits upright, structured, and visible, protected from crushing while turning a functional collection into an intentional visual display.
Walking into the dressing room now feels like stepping into a curated studio rather than navigating a domestic obstacle course.
3. Solving the Small Open Kitchen: The Countertop Coffee & Appliance Bar
If you live with a compact open kitchen, you understand the constant dance of small appliances. For months, our daily cooking flow looked like this: reach into a low cabinet, haul out the air fryer, use it, wait for it to cool down, clean it, and haul it back into the cupboard. The same ritual applied to our small toaster oven. It added friction to every meal, subtly discouraging me from cooking at home.
The problem was a clear lack of usable counter space alongside limited cabinet depth. The solution wasn't expanding the kitchen footprint—it was rethinking the adjacent living room layout.
I selected a multi-tiered credenza-style storage cabinet with a wide, open surface to bridge the living and kitchen spaces. This unit now serves as our dedicated beverage station and secondary prep hub.
- On top sits our Nespresso coffee machine alongside glass water carafes and daily drinkware, creating a dedicated morning ritual corner.
- Right alongside it live the air fryer and small oven, permanently plugged in, ventilated, and accessible without moving a muscle.
By taking these bulky, essential appliances out of hiding and giving them a permanent workstation, our main kitchen prep counters are suddenly completely clear for chopping and cooking. Removing that friction has made whipping up quick weeknight meals effortlessly appealing.
4. Vintage on a Budget: The Magic of Patterned Decals & Stickers
Once the structural and functional issues were resolved, it was time to address personality. I have always loved the depth, history, and warmth of classic vintage aesthetics—rich encaustic tiles, heritage borders, and nostalgic pattern work. However, hiring a tiler to chop out existing tiles or re-plaster backsplashes is notoriously messy and expensive.
I spent countless hours diving down rabbit holes on interior DIY YouTube channels, design blogs, and craft forums, studying how home renovators refresh rentals and flats using peel-and-stick innovations. The quality of modern vinyl decals has evolved remarkably—the finishes are matte, textured, water-resistant, and surprisingly durable.
I ordered a selection of tile and wallpaper stickers featuring detailed, muted vintage motifs.
- In the kitchen, I applied vintage-patterned tile stickers directly over the tired backsplash tiles. The transformation was instantaneous; the muted patterns brought depth and architectural charm that looks bespoke.
- In select nooks and feature corners, I added textured vintage wallpaper decals to break up large expanses of paint and inject nostalgic charm.
This approach gave our flat a distinctive, old-world character without requiring structural demolition or spending a small fortune.
5. Layering the Details: Ambient Lighting and Vintage Accents
With the color scheme and functional zones anchored, the fun part began: layering the soul of the home through lighting, shelving, and decor. Modern flat construction often suffers from harsh overhead ceiling downlights that wash out character. To lean fully into a vintage vibe, lighting must be layered, warm, and low-level.
I swapped out sterile fixtures for vintage-inspired light fittings, incorporating warm-toned brass accents, milk-glass pendants, and tactile pleated lampshades. In the evenings, these cast soft pools of amber light across the rooms rather than flooding them with an institutional glare.
To complement the lighting, I mounted a series of compact, ornate display shelves. These small wall fixtures allow me to display curiosities, framed vintage art prints, small ceramic vessels, and antique brass details without eating into floor area. Every piece has a story, and together they add the tactile warmth and layered history that defines a lived-in, cozy home.
The Road Ahead: An Ongoing Work-in-Progress
Renovating a home while living in it is a marathon, not a sprint. We are still in the thick of it: there are trim edges waiting for touch-ups, a few final hardware swaps for the cabinetry pulls, and additional vintage styling to complete.
Yet even in its current transitional stage, the shift in atmosphere is unmistakable. By pairing practical storage systems—like the open rail wardrobe and dedicated appliance sideboard—with high-impact cosmetic upgrades like paint, vintage decals, and warm ambient lighting, the flat has evolved into a space that feels deeply personal, functional, and restorative.
Creating a home you love doesn't require a blank-check contract with an interior design firm. Sometimes, all it takes is a clear vision, realistic measurements, a bit of DIY research, and the willingness to pick up a paintbrush and make the space truly your own.
I’ll be sharing more updates, close-up photos, and specific DIY product sources in the coming weeks as the final details fall into place. Stay tuned!
Explore Related Guides on DIYhowto
Continue your home design journey with our companion master guides on Layered Ambient Lighting, Minimalist Floating Wall Shelves, and Eco-Friendly DIY Materials.